The New Year of 2015 has come,
and Beckon is getting to spend what is hopefully her last warm winter indoors.
Fine little touches are getting done, and more boat jewelry is being added....
The plan is to transport her to the coast in the spring.
I think that Richard is looking forward to having some reasonable headroom for his projects
i.e. the great outdoors.
Remember that any pic can be clicked on to enlarge.....
i.e. the great outdoors.
Remember that any pic can be clicked on to enlarge.....
Back in September, the plans for obtaining the lead for the keel finally came together...
The keel we were looking at in a Bellingham boat boneyard (correct weight and alloy) was sold out from under us about half way thru the summer. We were told that it was in an area of the yard that was inaccessible due to mud, then boom, it was sold and gone.....very disappointing to say the least.
We started to scramble....but, as always seems to be the way,
Friends to the rescue!
While at the Port Townsend Wooden Boat Festival, our Orcas Island friends worked up a plan for obtaining a keel from a K40, and transporting it off the island
and all the way to Montana......
Thank you Steve for all your hard work!
This girl is being used as parts for another K40 that her owner is rebuilding....
what boat guys needs two keels?
The amount of lead is perfect....
And it will be a part of Beckon!
Given a new shape, it will get back in the water and see the world!
Steve moved the K40 to his property to do the actual removal...
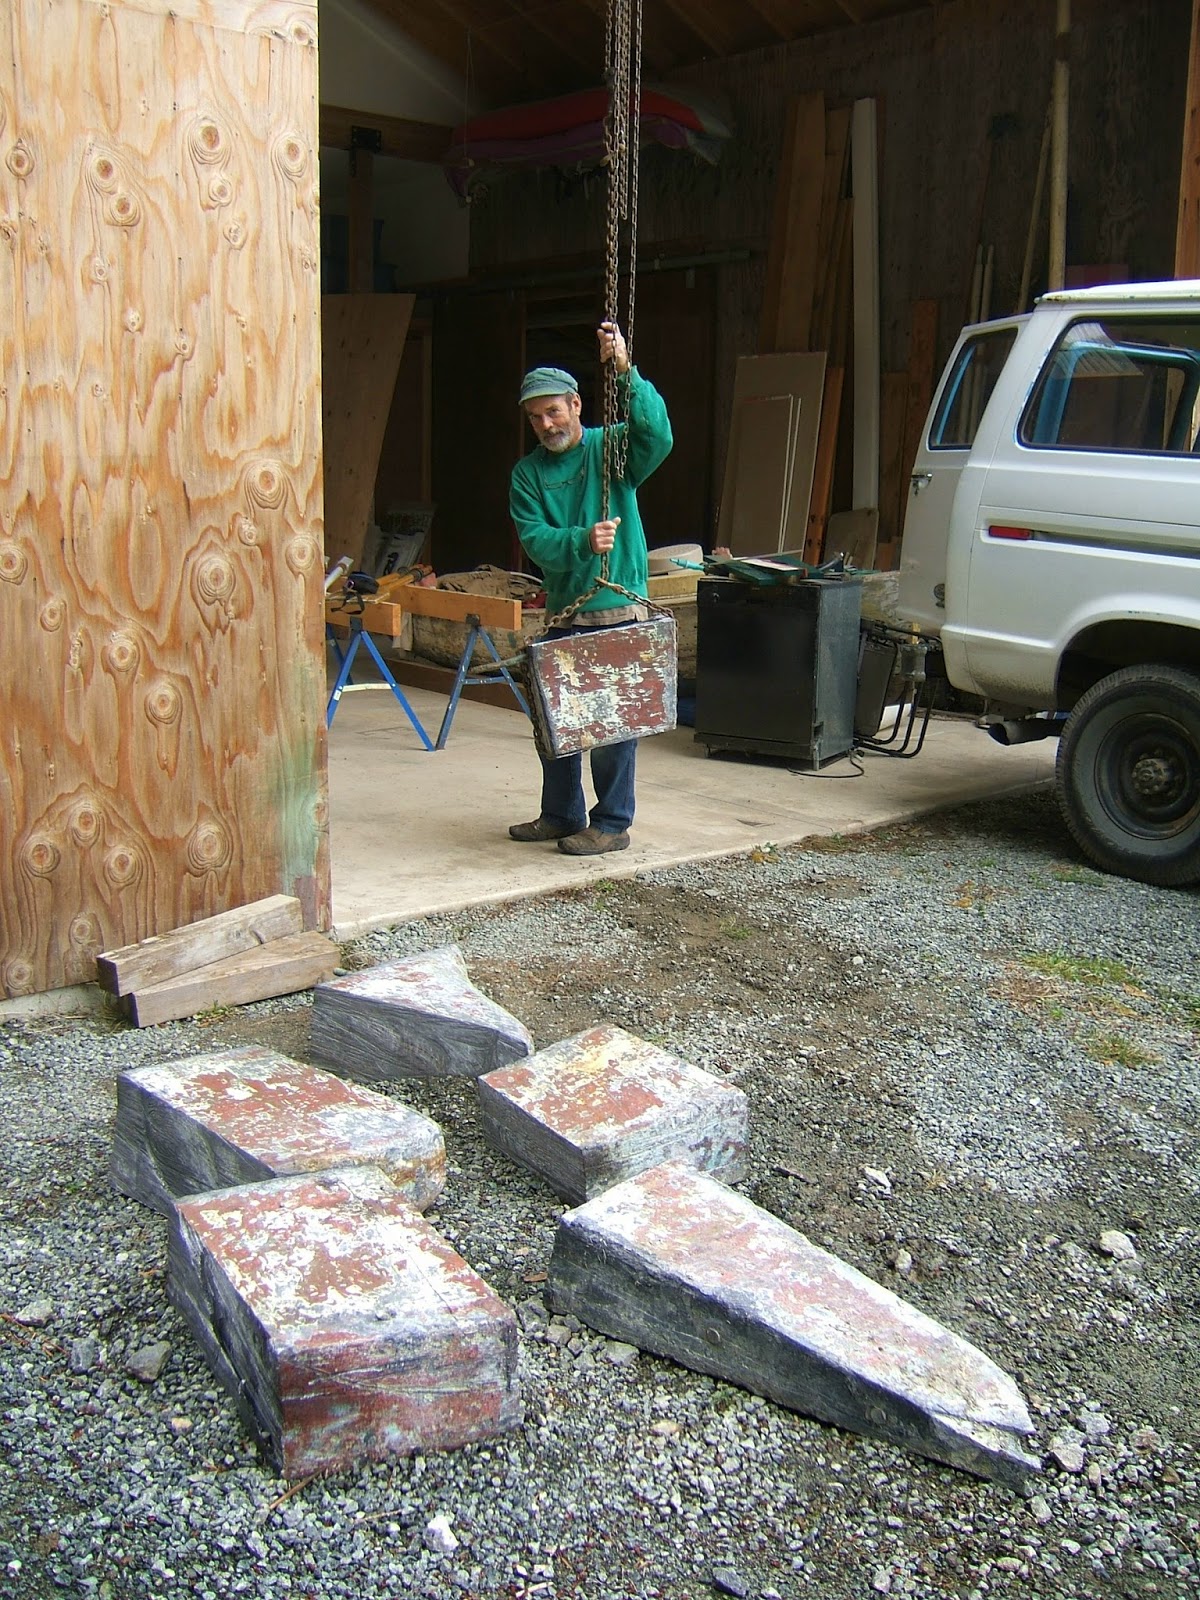
it all sounds easy, but that hunk of metal is about 5000 pounds!
The logistics of handling that much weight was a continuing work in progress...
Once he dropped the lead under the trailer, Steve used his truck to drag the keel over to his shop where he had an overhead beam for hoisting the pieces into the truck and trailer.
He built a lead shaving containment booth and used a chain saw to good effect. He then tested to see that the beam would hold the pieces for loading....
each one of those pieces is close to 1000 lbs!
A little chain, a few blocks, and some ingenuity.....sailors rock!
One evening we went to Eric's to give the system a test run....
Eric had the parts all designed and made,
so the plan was to set it up and try to boil some water....
Lots of design features for stability and heat tolerance.
These legs are designed for house moving, I think.
They need to hold over 5000 lbs.
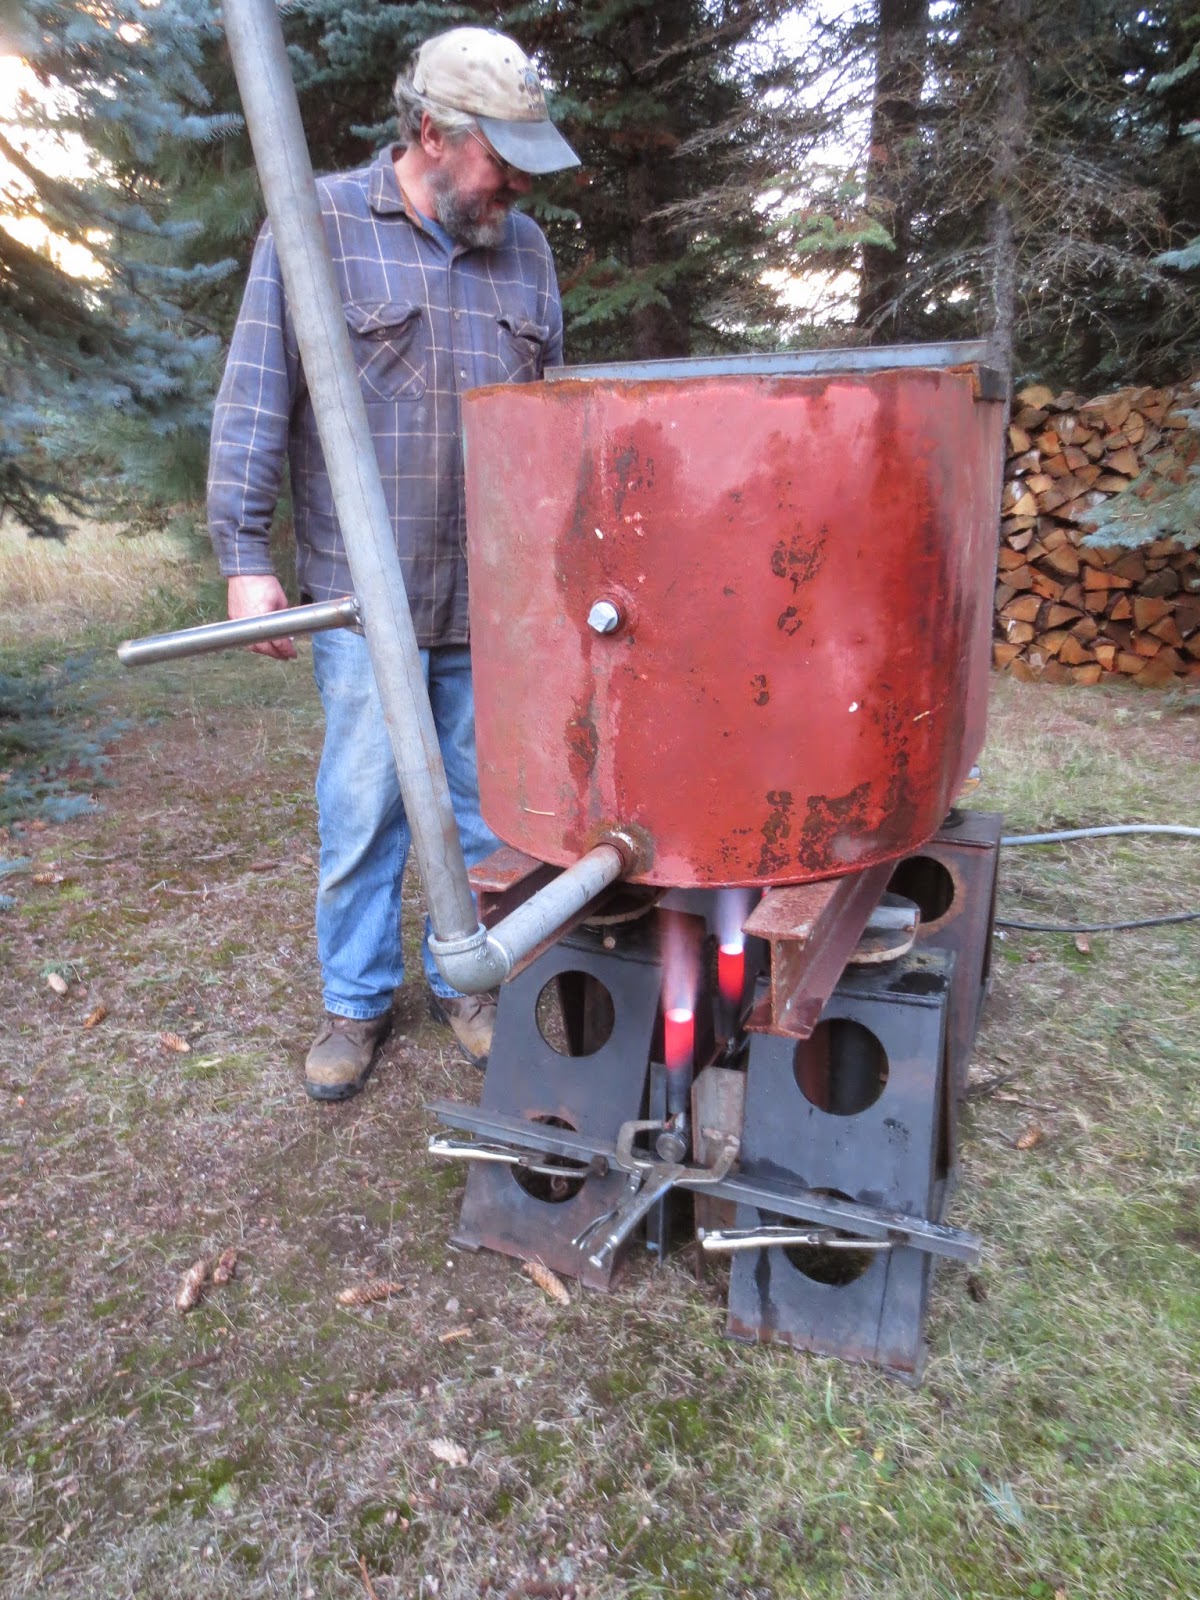
The tank is built from an old heating oil tank.....and reinforced.
Eric designed and built the heat source for along the underside of the tank
with 4 of these venturi type nozzles, with adjustable air and propane flow.All hooked up, ready for lighting....
Richard filled the tank with water to about halfway.
The galvanized pipe fitting off the end is designed so that the outlet will remain above the lead level in the tank during the melt,
and then be rotated down to dump the lead into the opening on the top of the form.
Note that Eric even put a handle on the spout....
The scary moment of lighting...
Eric reassures me that the high melting point of steel will keep the tank from melting..
I will stay safely to the side for a few minutes....
All seems well....
And we keep thinking the Revenuers will show up....
and wonder what we are cooking.
The nozzles are starting to turn really red.
Getting warm! The water got really hot and heading toward a boil.
End of the test for now....it's cold out!
Of course, it's an "early cold spell" when they arrive.
Half of the lead is in the bed of the truck,
While the other pieces got to ride in luxury in the back of the trailer....
Those pieces don't look as heavy as they are!
The guys had great traction with all that weight, for the way over in the early snow storm....
And Steve looks a little doubtful that the rented engine hoist will work for
lifting and moving those 1000 lb hunks.
Hmmm.....Richard thinks they can slide the pieces out of the trailer.....Roll them on pipes to the back of the trailer...........
Get them eased onto the platform, watch the toes.....
And pull the trailer forward.....
Dropping it into the perfect position......one down!Setting up a system......
These guys are pretty resourceful....
Those Egytians worked hard....
but got it done....Even Mike came out of the shop to check out the progress.
Now to attack the blocks in the truck bed....
Oh No!....they froze to the rubber mat in the bed!
Levers and pipes get them free...
And ease each one to the back of the bed. Not on the tailgate....too much weight. Steve is checking out the capability of the new high tech dyneema line.
The lift is rated at 5000 lb. The line is rated to some crazy number like 11,000 lbs.
Lots of stretch initially, but it held lift after lift.
Creativity was needed while coming up with ways to tie the odd shaped pieces,
and then be able remove the line from under the piece when it was set down..
The lift worked well to maneuver the blocks over to the platform.Note that Richard thought to elevate the platform, so the legs could slide under....
Each added piece seems to crowd the platform....
but the last piece was freed from the truck....
and delivered to the pile.
5000 lbs of lead delivered! And three proud guys!
Thank you so much, Steve and Robbie!
A very successful trip in our book....
And of course.....we can't send them back to the island empty handed....
But there seems to be way more cabinets than room in the trailer....
Will we need to put some cabinets in the back of Robbie's truck, out in the weather, for the trip home?
We will get Mike and Quinn....our expert cabinet packers, to work on it....
Oh My! Room enough for a Costco stop on the way home!
Thanks so much to Steve for all of his hard work in getting this all to come together,
and Robbie for being willing and able....
Everyone has been so good to us, and can claim a part of the Beckon legacy!
So....remember the form, awaiting lead in the shop?
Richard and Eric did the setup of the melting pot, and positioning the form,
on one cold dry day.....
The form was moved into position over a sheet of protective plywood with our pallet jack.I have been assured this plywood will protect our asphalt driveway from spills.....yeh, right!
They got it all leveled up, so that the lead will flow evenly into the form.
Care was taken to set up the melter.
Now they need to get those crazy heavy lead pieces up into the tank....and surround the lower tank with cinder block as a heat shield.
The engine lift was pressed into service with the well used dyneema...
and Bob, our neighbor arrived.....hoping to witness and document a pour that day...
Slowly and surely, each piece was worked toward the pot...
Hummm....those cross braces seem to be making it more difficult
to position those heavy pieces in the pot.
Those guys are resourceful.....but....oops!!!....the uneven weight of the first piece is
tipping the tank off the legs and I beams.
Luckily it wasn't untied and could be re-hoisted and rearranged.
Oh...and don't worry....

They assure me that the weight of the previous blocks will
stabilize the tub for all the additions....
Getting pretty full.....
One last chunk...
Hmmm....That last piece is pretty tall! Not really IN the pot...
And since it took the entire day to set up and load up the melting pot....
the tired guys decided to start the melting on a different day.
The pot full of lead and form for the new keel are tarped for the next weather window....One snow-free night a couple of days later,
I came home from work to find lots of fire in my driveway.
Unfortunately, it was a beautiful clear night, which means very COLD!
Even with all the block around the base of the pot,
15 degree F temp outside is just TOO cold to try and bring
those big blocks up to the needed 650 degree melting point.
The burners are red hot, and after about two hours, Richard could only get a reading of about 300-400 degrees on the large blocks,
using his handy dandy infra red thermal scanner....
Even with Eric manning the hand held weed burner
(which actually was the most effective at melting)
and a bunch of quick melting scrap in the bottom of the pot,
it looked fruitless......and besides, it was COLD out there.....!
So....the pot was tarped up and the form moved
back into the garage for the up coming weather...
Ready to try again on a dry and hopefully warmer day.
New approaches are being bantered about....the saga will continue.
In the meantime,
rub rails of Ipe were laminated and shaped.
They will take the pressure of the chain plates as they come over the deck ledge.
The scoop that Richard fabricated earlier, made to angle the anchor chain
from it's hawse pipe near the windlass into it's locker
was sanded up and painted.
Too bad it is hidden up inside the forepeak.
Again, Richard got some beautiful locally grown, fine grain larch.
And gave me a mock up for the photo op....
The stern rail has been completed by Eric in red brass.We finally came up with the plan to extend the upper rail forward on the sides,
in anticipation of accommodating solar panels.
And of course, Eric added a totally custom detail when I mentioned
we needed to allow for a safe method of
getting to the wind steer mechanism while underway,
and wouldn't it be nice not to have to climb over the stern rail when stern in at a dock?
He created a really cool, positive locking,
spring loaded gate latch system for the center of the top rail....all in bronze.
She really is beautiful.....
All the boat jewelry.....
Eric even bent a bronze rod to the curve of the saloon beams,
and created larger, more secure end caps for the butterfly hatch stay.
The stays slide along the bar.
Moving them apart and tightening the
screws holds the hatch "wings" open.
We also put a "dog" on each side above the bar, for securing the hatch down in rough weather.
The curve of the bar not only looks great,
but helps maintain headroom in the saloon.
Lovely....


