
It has been a year of blog negligence!
I have been trying to keep up on the pictures, though......as the build continues.
Quite a few of the projects this last year do not lend themselves to pictures,
such as plumbing and electrical. But we will get to those soon.
These pictures start from fall of 2012.

These are the cap rails for the bulwarks.
They were laminated up and fitted to be removable so that the hull can be finished more easily.
The groove you can see in the bottom fits tightly over the bulwarks when mounted.

At this point the cabin and companionway trims are being completed.
The cabin sides are being sanded between numerous coats of varnish.
The cabin has been filleted to the deck in prep for painting. No combings yet.

Unpainted cockpit area, before combings being mounted.

The turtle, the fixed cover that the open companionway hatch slides into,
is in place, but the butterfly hatch and front hatch are still just openings in the cabin top.

Here is how she sits in her summer position.
Jane is not thrilled to park outside during Montana winters,
so she will be pushed back into her side room before winter.

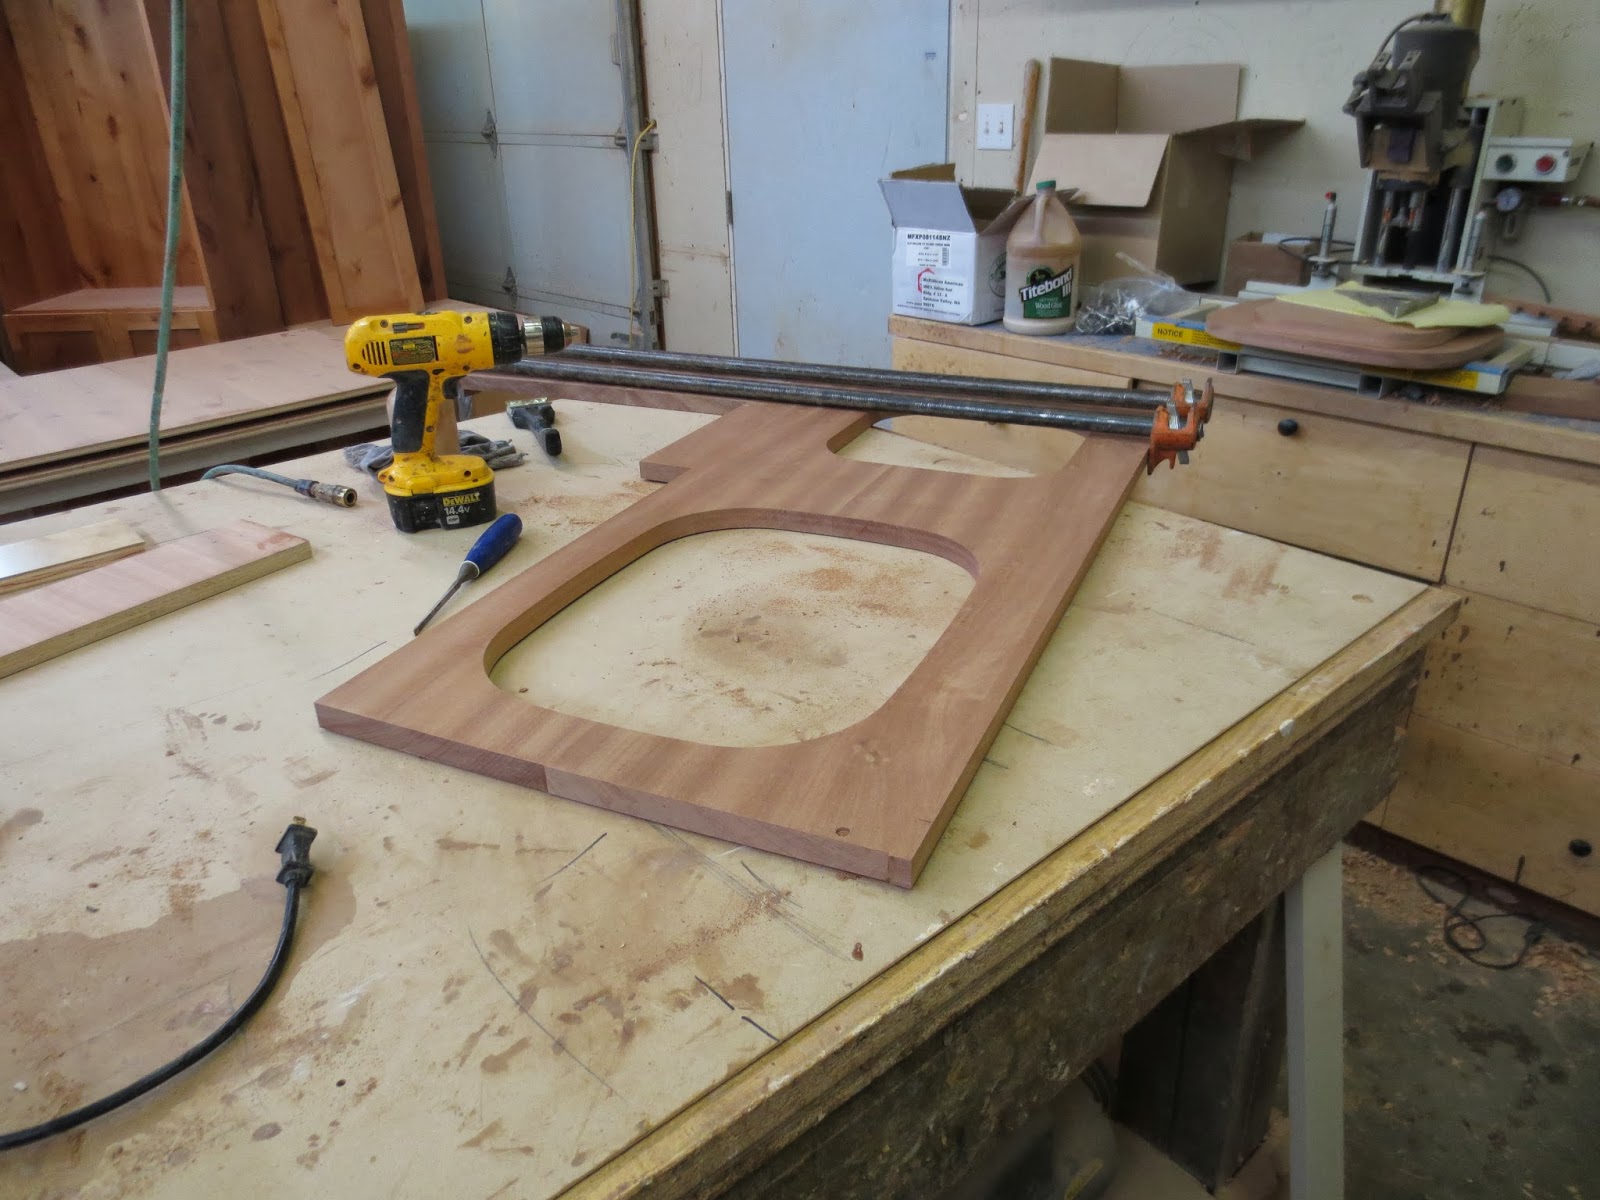
This is the frame for the front hatch. Note that it is scribed to the cabin top.
There are the ever important drain channels around the inside.

Combings in place, and cap rails in place with screw holes drilled, they will later be plugged.

It was a hard decision about how to join the combings to the taffrail in the cockpit area.
It is all in the "look". We decided to run the taffrail (back piece) slightly higher than the combings and keep them tucked under...but run them all the way back in an attempt to keep the cockpit drier, when the decks are awash. Note the taffrail "corners" that Richard is starting to notch in....

We are so happy with the shape of the wide decks.

The combings are screwed from the transom.

She is pushed back into the side room in order
to get a little height to do foredeck work.

These little melamine mock ups show where the bits will go thru the deck.
The bits are a tough structural component that attach to the stem,
the structural part of the bow, and
protrude through the deck to hold the bowsprit.
They create a very strong place to tie off lines for anchoring and towing.

Richard laminated an extremely beefy piece of oak to attach to the stem
with 7" lag bolts and epoxy.

.....the bits are solid white oak and finished bright.

She is SQUEEZED as far back as possible into the side room so that
the bow could swing into the taller area of the sloped ceiling.

Even then....a hole had to be cut into the drywall of the ceiling
to get enough height for those long bits to drop thru the deck....

Truly strong....

All varnished up....and hidden behind doors.

Creating a grab rail along the inside of the cabin at deck height
was one of those "compound curve, bent two direction" type issues.
Never too hard for Richard!
Thank goodness for two strong friends and a zillion clamps!

On second thought, he feels steaming may have been the easier technique
to use vs brute strength. But it is extremely strong, comfortable to grab,
and can also work as a drip catcher for open portlights.

A lot of epoxy and screws keep it from walking back to the forest....
and a little paint and putty repairs the bulkhead.

The scuppers are cut directly into the bulwarks.
Drilled, cleaned up, thickly epoxied to prevent water intrusion, and painted inside.

A lift off panel type engine room door was built of the v-groove to match surrounding cabinetry.
It is framed out toward the inside to be very light weight and hold more insulation.

The weep traps inside the lazarette are panted and ready for insertion.

That odd shape actually works to catch water trying to leak into the storage area
from the edges of the hatches.
Weep holes will still need to be drilled into the cockpit for the troughs to drain into...

Inside the saloon, a track was developed for the pilot berth
to pull out into a double berth.

Trying to figure out the height and shape of the leeboards.
(the high edge that keeps a body from rolling out of the berth
when healed over or in a rolling anchorage.) We will also use lee cloths.

Outside, the bright work was masked and the deck painted with System 3,
waterbase 2 part linear polyurethane....Whidbey White.

It really cleaned up the appearance....

And we are very happy with the color and contrast.

Shiplap trim was put around the inside of the cockpit, primed and painted.

The contrast really accents the bright work.....

A mock-up was needed for the companionway ladder.
Needs to be easy to navigate, yet small enough to move past into the galley.

There is still room to squeeze into the galley.
And actually the ladder provides a good stability point for
wedging me into the galley during rough seas. Beats a strap any day..
and always optimistic about weight loss...

Wow...doesn't she look beautiful?

Soft and shiny...

The cockpit sole is crying for a grate....
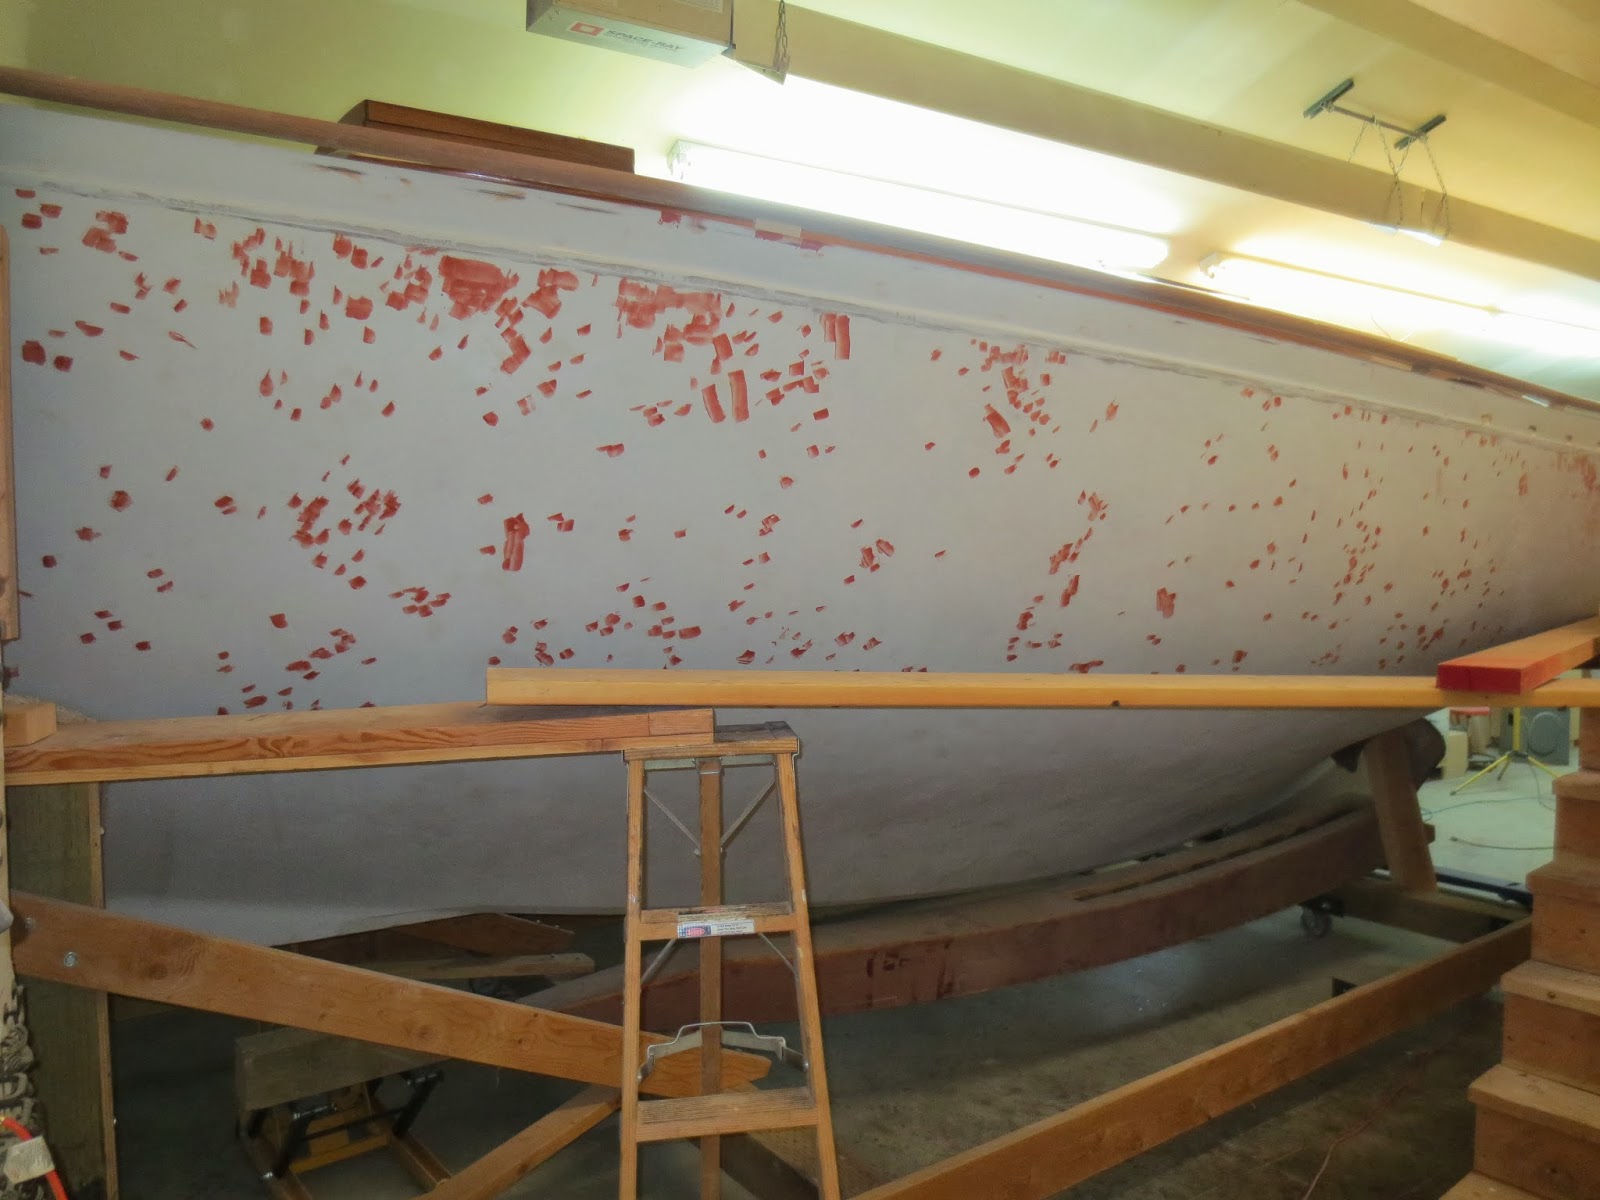
All the pin holes in the primer were again filled and
sanded smooth in prep for the topside paint application.

Makes her look like a restoration nightmare...

Once the sides are resanded, the hull was leveled up
and the waterline was sighted on the hull with a laser transit.

Note that the cap rails are sitting in position,
but raised up to make the painting easier.

The waterline really highlights the hull shape.

Oops....going to need to finish the prop aperture shaping prior to painting...

Back to the "adult supervision only" wicked grinder,
to shape the starboard side the same as the previously done port side.
Then it needed glassing and priming.

Richard initially tried spraying on the product.

Masked front and back....

Even the top...

Even though he is a very experienced finisher,
and excels at applying sprayed finishes,
Richard was never happy with the application he was getting by spraying the product.
He tried every dilution and technique he could think of,
and never could get it to atomize appropriately.
He ended up using the "roll and tip method", with fabulous results...

Beautiful shine.....after about 4 coats.

Only a little messy sanding between coats.

Next on the agenda was the transom hung rudder.
1 1/2 x 1 1/2 clear fir strips were laminated to shape.

The very tall portion fits next to the transom.

It was clearly marked during construction,
to prevent hitting nails during the shaping process.

The shape of the lower part starts to appear....

The entire rudder is very large when the two sections are joined. It will be shaped later...

The butterfly hatch was designed and pieced together.

The doors are made to open on a continuous stainless steel hinge.

The case seen here actually fits inside an outer sleeve.

The outer section creates the water gutter.

Looking up from inside the cabin.....

Butterfly hatches are notoriously leaky....
that is the reason for the gutter system all the way around.

The super tough scratch resistant polycarbonate will be top mounted with silicon....

The reverse of the gutter system is found on the door....
the ins and outs fit together and block leaks.

Richard decided to use hard-as-nails Ipe (aka Brazilian Cherry) for the cabin sole.
It is virtually undentable and its dark rich color fits well with the mahogany.
He milled solid strips into a 1/8" veneer and used Sikaflex 291 to attach it to the plywood flooring.

A load of clamps around the cutouts and nailed blocks
in the flat areas help hold it in place for drying.
Scribing in the head alone took a couple days...

But was worth every second...
This is during the sanding phase,
many coats of oil have given it a durable, renewable, non-skid finish.

The grates for the head and the companionway bilge
were also made from Brazilian Cherry and oiled.

To cut the scuppers into the cockpit sole a whole saw was used.
Then to get a flush fit for the drain, Richard created a
custom sanding/cutting block...

.......this created the bevel that the drain needs to sit flush.

A grate will also cover the cockpit sole.

All the misc plumbing parts were organized into systems
to get prepped for the arduous plumbing project.
Not complicated, just tedious with lots of crawling, reaching, bending....

Of course, all the plumbing and thru hulls
are placed and secured in an orderly neat fashion.
We decided to go with the lav-vac.
It uses small amounts of water and fits conveniently
under the bench in the head area, along with the thru-hulls.
The holding tank is in the compartment toward the bow,
along with all the stopcocks for directing the flow.

All pumps and plumbing are secured and hidden in cabinetry.
The countertop for the galley was glued up from 3/4"solid mahogany.
The under mount sink and storage access were cut on the CNC router.

The fiddle behind the stove top was glued on....

A custom gutter molding strip was designed and milled
to be the bracket holding up the storage compartment lid.
Jane was having visions of crumbs and water
slipping through the cracks and into the storage area, now she can clean out the gutter.....

For the bowsprit to be a strong spar that could handle the forces applied by the sail rig,
a 12 foot long 6x6 piece "free of heart" douglas fir was desired.
That means there is no log center prone to rot.
It must come from a large tree and be knot free.
A beautiful piece was sourced and kiln dried at Whiteman Lumbar custom mill in Cataldo, ID.
We appreciate Brad's care in finding this beautiful piece for our bow.

Richard squared it up, and created jigs to cut the gentle taper of the round length.

Then it was cut to 8 sided, and the notch created for the crans iron.

Notching and slicing continued to obtain the round.

The electrical system seemed a daunting task.
Richard was experienced in AC wiring, but setting up a 12v DC system
appeared overwhelming. He started at the bank of batteries and worked forward with switches, chargers, bus bars and an 1500w inverter.
We decided to use all LED lighting, have a couple electric water pumps (house and wash down), several bilge pumps (numerous tiny bilges) and minimal electronics
("pads" for navigation, AIC, VHF & SSB). A very simple electrical system, but yikes! What a mess!

With the help of a label maker he managed to get the whole mess under control and organized.
He placed the electrical panel above the frig,
using a BlueSeas combination DC/AC 100amp/50amp panel and the area next to the hull.
BlueSeas provided nice schematics and online info.
He made the panel drop forward onto the frig top for easy future access.
A couple remote fuse blocks were used for small things like lights and small fans.

Mid summer, Richard started prepping for the mast by building a mast table.

It needs to be very long, straight and open so that clamping and applying jigs is possible.

The front edge provides stability. It uses the entire 40ft long wall,
with the mast being 35ft long, about 29ft above the deck.
Now a few overview pictures front different stages in the build....

This was one of our Christmas pictures, note the flooring was not down,
no lighting and the settees are incomplete.

Detail of the companionway, with its brass slide bar...to make it glide easily.

The galley from the companionway.
Note the plumbing manifolds in the storage compartment in the counter top. This can be used to pump fresh water back and forth between water tanks and to isolate areas of plumbing.
The battery bank is under the sink.

We put in a fresh water hot/cold faucet, a fresh water foot pump spigot,
and a cold sea water faucet for pre washing dishes.
The pumps have switches right on the counter face for ready on/off access.
Note the two small rocker switches above the louvered door on the back counter.
Those are small round rocker switches found at Del City electrical supplies online
(lots of DC supplies). Fine little flush mount switches in black and white.

The head has a pull-out shower head faucet.
There is an AC outlet inside the sliding cupboard,
and a covered DC outlet at the end of the sink near the head pump.
The small DC fans are awesome, and really move a lot of air.

The drawers and drawers in the head were completed
and have lift-to-open wooden slides and wood pulls.

Here are a couple of the automatic bilge pumps near the mast step.

A view down the saloon. The tip-out doors on the settee are finished with hardware.

The LED reading lights in the saloon, with the undercounter lighting in the galley.

The starboard side of the saloon, with an AC plug over the settee,
a reading light, and undercab lighting at frig.
She is really starting to look like a completed boat.
And living up to her given name
BECKON
WOW, very impressive Richard & Jane, Beckon is a "work of art" .Can't wait to see her in PT. Just to help inspire the final "push" I found this build on the web
ReplyDeletehttp://www.harriswoodenboats.co.uk/index.php/new-builds/alva
Rick & Karen
S/V Avalon
Nice work :)
ReplyDeleteLike us!
https://www.facebook.com/legacyyachtsllc