
February 28, 2015 was a notable day for Beckon....a beautiful day in late February in Montana, and she moved about 50 ft closer to the ocean.
Extricating her from the "boat room" was one of those long awaited
and "of course it will work" events....
Everyone that has visited her has noticed the same thing,
she is taller than the garage door!

She was actually built in a room to the right, inside that door....so with lots of jockeying around and removal of some cabinets in the garage,
and the top piece of trim over the roll-up door,
Richard was convinced she would make it out...

He did removed the bow roller and the butterfly hatch.....

He was convinced she would make it by inches, as she got closer to the door.....

Everything would be fine, if she didn't tip stern too much
going down the slight slope of the drive....

All the reinforcements arrived....boat friends are awesome....

When they started to move her down that very slight slope, I wasn't sure what Richard would do if she really started to move!

It's hard to see, but Gary is up on the ladder,
right inside the door, keeping a close eye on the clearance....

With the guys pushing and levering on the cradle.....

Richard found out that the pallet jack was the tool of choice...

A pause to check....

It looks like she is clearing....but not by much.

Slow and easy, and no Crisco needed!

A few more feet and she will be in her new spot, for the next few months....

A job well done! Thanks so much guys!

Our first views of her from more than a few feet away.
We finally get to see her sheer...

And we love her lines....

Time to get all the hatches and accessories back on!

It is still February in Montana, of course!

Richard replaced trim around door,
and the job was complete....

Now I could look from my kitchen window, and watch her progress....

We got the idea to cover her from the weather,
but it turns out the PVC frame and tarp couldn't quite stand up to the wind and weather......so that was abandon fairly quickly.

So a few mornings we woke up to a dusting of snow on her....

She doesn't seem to mind.....

She slowly started to get reassembled....including stern rail, stanchions and bowsprit...

She makes an interesting driveway ornament...
Richard spent the cooler days building blocks from ironwood...

After deciding on size, he cut numerous blanks for the sides....

These blanks are the spacers around the sheaves....

This gives you an idea....

He mass produced singles and doubles, as spec'd out on rigging....

A few jigs were needed to produce the grooves for the line attaching the blocks to the mast.
Ones for the top and bottom...

And an angled one for the tapered grooves on the sides.

Jigs for everything....

They are a beautiful thing.....even before being soaked in "Boat Juice." This is a mixture of linseed oil, turpentine, little bit of old varnish.....and sometimes a little teak oil....yumm.

After inserting the sheaves, turned by Eric from acetal,
Richard took on the learning curve of splicing on the thimbles....

He came up with a few different styles.....some with beckets...

The jaws , that holds the boom at the mast, were laminated form oak....

The half round area pivots around the mast.....the little block pivots as the boom end is raised, and adjusted.

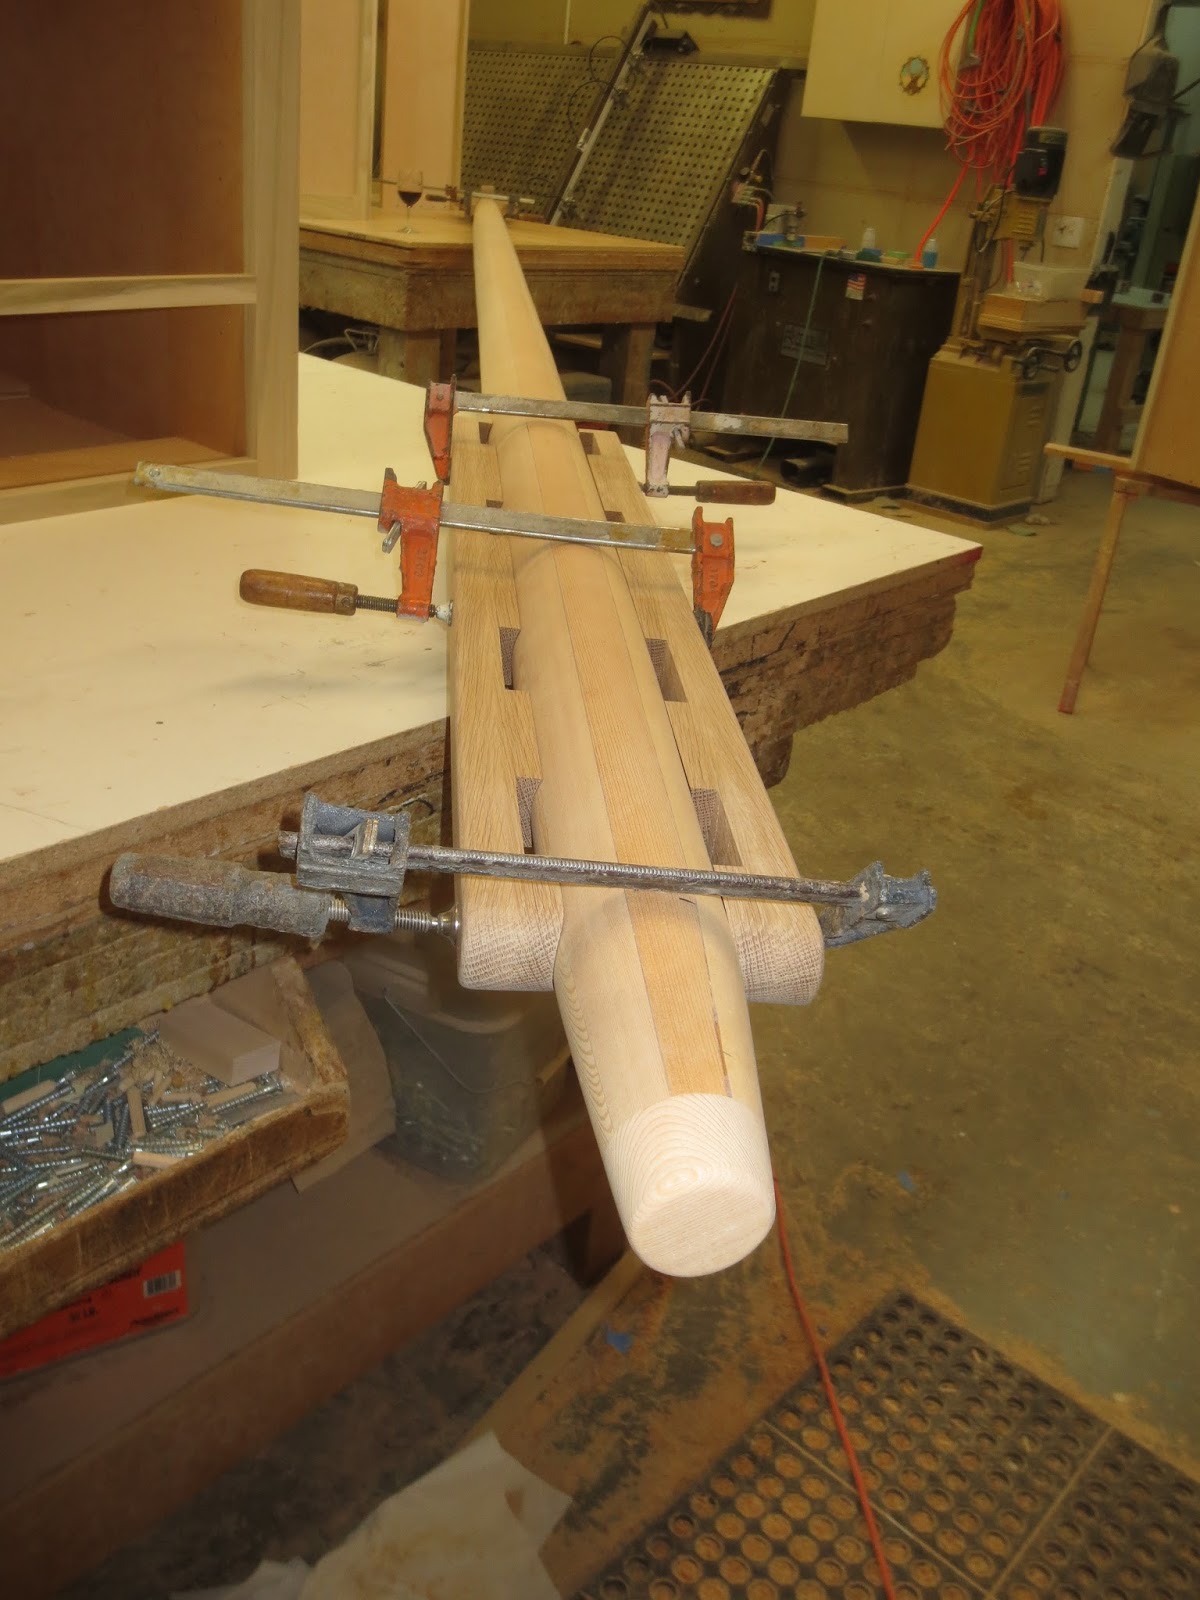
Boom of larch and the jaws in oak....all scribed to fit....

The reefing comb was fitted to end of the boom.
Sheaves (rollers for the lines) will go in each slot....

Clamp, scribe, fit, shape.....

And varnish.....

And more varnish, and more clamping....

Lamination and through bolts make it very strong....

Richard came up with a way to varnish the upper spar (gaff) all around....

Turning it on a spit.....

The gaff jaws were laminated up in the same manner as the boom jaws,
but they are slightly curved up on the end so that they can sit at a cocked angle as they are positioned up the mast to produce that beautiful quadrangle sail shape....

Then Richard attacked rigging needed at the mast head....
All the cheeks and blocks had been mounted and lacquered......

Learning to splice three strand....around a mast.....not the easiest!

Thank goodness for You Tube....

And of course, each demonstration is different, so there is lots of
measuring and re-measuring.....trial and error...

The finished product rapidly got better looking as his skill increased...

Joy, the lab, was very patient with the progress.....as long as she had her warm bed...

Not too shabby for first three strand splices.....
New England Rope- Vintage Three Strand.

The hole for the mast was also cut through the deck....and the mast collar applied.

The collar supports the shims the position the mast,
and has a lower lip which gives attachment for the mast boot.
The mast boot keeps the weather from dripping down the mast into the cabin...

The mast step was cut into the proper location over the keel,

and the hole for the wires coming out the bottom of the mast
was drilled into a close by bilge...

Thimbles were spliced into the ends of life lines of New England Ropes
Endura Braid Classic 8mm, and they were attached at the crans iron on the end of the bowsprit...

And run back to the "gates".

The lifelines make her look so "Yacht-ie"....

Details, details....

A handsome splice around the wooden lashing thimble...

The lashing that will go between the two thimbles will work as tension adjusters.

The inside appears much brighter with the sun coming through the butterfly hatch.

Richard became a pro at the splicing of double braid....
this tough stuff and huge thimble became the bobstay.....
The most difficult part on this large line is burying the cover back into itself....
see that white core visible at the junction of the two legs?
(note the other end of the line attached to the 5k lb keel.)

To get the amount of tug needed, easily, hook it to the truck bumper....

And give it a large tug.....

Voile! A beauty of a splice.....

Now the hard part is getting the measurements to come out precise
with the splice at the other end...

That is where the bronze turnbuckles come in handy....

A proud man....with the boom gallows in the background....

We made templates for the leather covered bearing surfaces of the jaws....
to add padding and protection.

They were each tested on the jaws.

They were all gathered up and taken to the local saddle makers.
They had the perfect type of leather and would cut them out in no time....

Richard even tried his hand at some soft shackles...

The parrel beads were turned in walnut, in one long string, on the lathe....
then cut apart....

The super heavy, solid ladder got put on a diet.
Lots of cut-outs lightened it considerably....

Back at the mast, Richard tried to get his head around
the placement of all the blocks and lines....

It didn't seem to be working out right, with the splicing being done through blocks
that were already epoxied to the mast.....

He decided he should change the blocks to ones that are screwed in place, in case he needed to change or replace lines and blocks....
How and why would you want to splice while sitting in the bosun's chair?

Richard and Eric also devised a way to rework the gammon iron....
they wanted to make it "opening" so the that the bowsprit can be raised.....

by removing a few large screws...

But strong enough to support the staysail.....
we were very pleased with the outcome....

The bobstay and the whisker stays were done in New England Rope,
Endura Braid Classic.
14mm and 10mm, respectively.

One day he even demonstrated the technique for me....

I love the hammering to soften the parts!

And then the big tug!
He has become quite proficient in the art of splicing high modulus double braid
and regular polyester double braid......
This blog is truly an inspiration, and I love reading it. I'm so happy I stumbled upon it. I'm super excited for when she hits the water! Do you have a date in mind for her maiden voyage?
ReplyDelete